A friend of mine has a camera dolly that he made, but wanted it remote controlled so i took a microcontroller, some other electronic parts, a broken servo and a old DVD players IR remote (DVD player quit working).
PartsUsed:
- Teensy USB 2.0 microcontroller
- 5V 7805 voltage regulator
- X2 TIP3055 NPN Transistor
- X2 TIP42G PNP Transistor
- X6 1k ohm Resistor
- Red Blinking LED
- Momentary push button
- 5V reed relay
- 9V battery connector
- 9V battery
- Broken servo
- An old DVD player remote
- General-Purpose IC PC Board
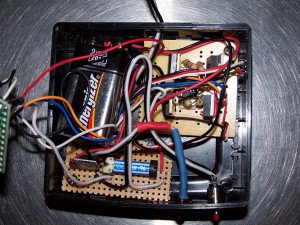
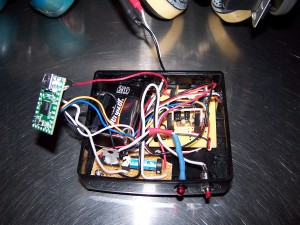
 You can see the h-bridge in the top right, lower left is the power regulator and the power on reed relay, to the right of that is the power on LED and the Power on button. To turn the box off you use the power button the the IR remote. I used an h-bridge I made because the broken servo that I used did not work with PWM, so I soldered to leads directly on the servo motor and removed the potentiometer.
 Here is the code I used on the teensy:
/*
 * Version 1.0 Nov, 2011
 * Copyright 2011 Elijah Cochran
 * http://www.elijahcochran.com
 * Open a Serial Monitor for new IR code retrieval in HEX
 */

#include

int RECV_PIN = 2;

IRrecv irrecv(RECV_PIN);

decode_results results;

void setup()
{
  Serial.begin(9600);
  irrecv.enableIRIn();        // Start the receiver
      // initialize the digital pins as outputs.
  pinMode(8, OUTPUT);         // "Motor lead 1"
  pinMode(9, OUTPUT);         // "Motor lead 2"
  pinMode(1, OUTPUT);         // Power Relay Pin
  pinMode(11, OUTPUT);        // Stats LED
}

int step = 1;
void loop() {
  digitalWrite(1, HIGH);      // Power Relay On
  if (irrecv.decode(&results)) {
    switch (results.value) {
    case 0xDEB92:             // left
      digitalWrite(11, HIGH); // Stats LED On
      digitalWrite(8, LOW);   // resets pins
      digitalWrite(9, LOW);
      digitalWrite(8, HIGH);  // begin motion
      digitalWrite(9, LOW);
      delay(5000);            // wait for five second
      digitalWrite(8, LOW);   // stop motion
      digitalWrite(11, LOW);  // led off
      break;
    case 0x3EB92:             // right
      digitalWrite(11, HIGH); // Stats LED On
      digitalWrite(8, LOW);   // resets pins
      digitalWrite(9, LOW);
      digitalWrite(8, LOW);   // begin motion
      digitalWrite(9, HIGH);
      delay(5000);            // wait for five second
      digitalWrite(9, LOW);   // stop motion
      digitalWrite(11, LOW);  // led off
      break;
    case 0x68B92:             // open / close
      digitalWrite(11, HIGH); // Power Stats LED On
      delay(50);
      digitalWrite(11, LOW);  // Power Stats LED Off
      delay(50);
      break;
    case 0xA8B92:             // off
      digitalWrite(1,LOW);    // Power System Off
      delay(5000);            // Wait five seconds to confirm its off
      break;
    default:
    Serial.print("Received 0x");
    Serial.println(results.value, HEX);
    }
    irrecv.resume();           // Receive the next value
  }
}
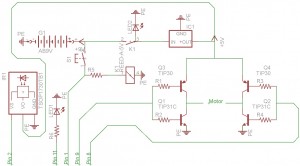
What you do is you turn on the unit by holding down the power button, until the LED start blinking. Then the code turns on the reed relay to keep the power on. Then it starts looking for a IR code to come in. Here is the schematic.
Your website is really very informative. Keep posting that way.
this was a lovely article to read.
awesome blog to read…love to read it, thanks for all.
Thank you for your internet site! I really treasure what you’re providing here.